 eJr Programming
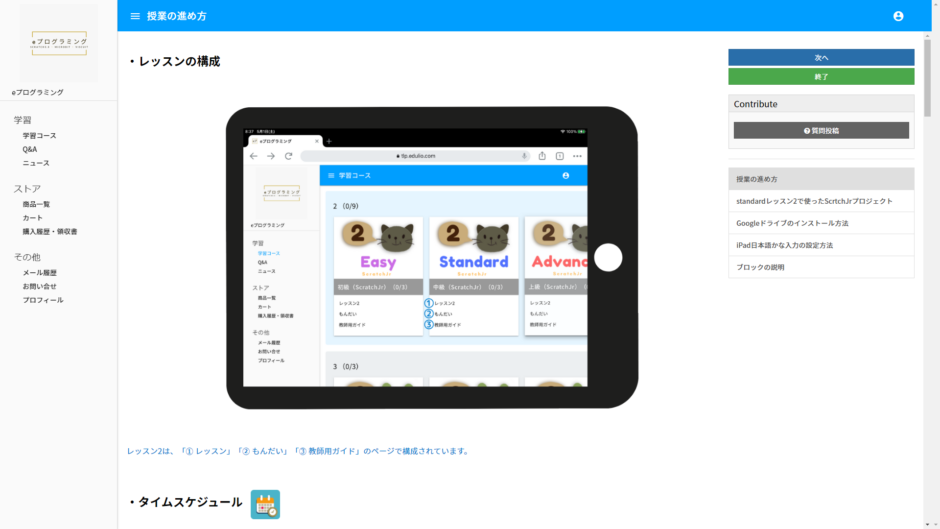


Structure of the Teacher’s Guide
Lesson Structure
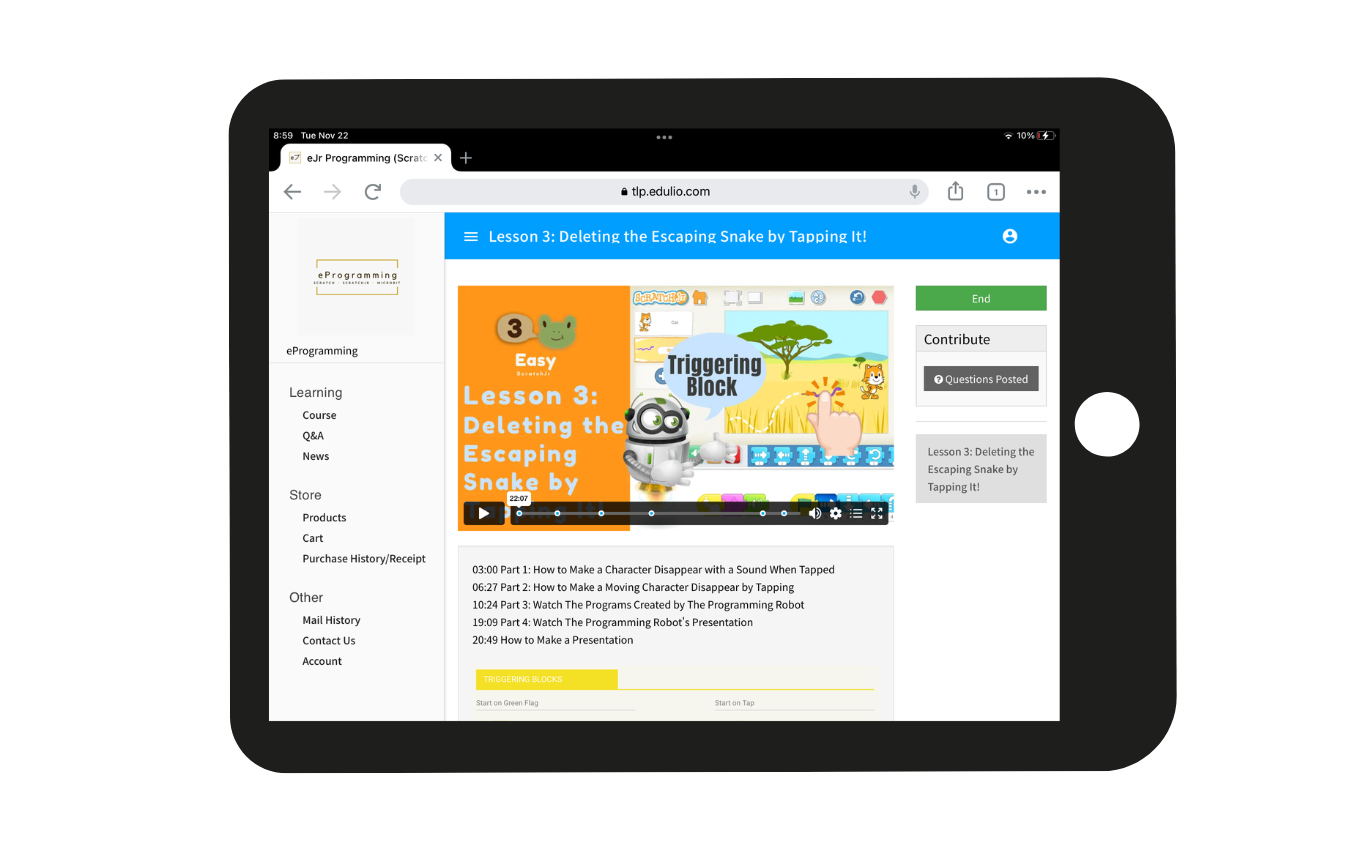
Lesson 3 consists of the following pages: (1) Lesson, (2) Questions, and (3) Teacher’s Guide.
Time Schedule 
In the case of 4 lessons per month
Day 1: Lesson 3
Day 2: Free Programming
Day 3: Test Questions
Day 4: Free Programming
In the case of 2 lessons per month
Day 1: Lesson 3
Day 2: Test Questions, and Free Programming
Lesson Method 
Please show the lesson videos on a projector ![]() or a large monitor
or a large monitor ![]() and use the videos as a teaching material for group classes.
and use the videos as a teaching material for group classes.
Easy Lesson 3: Chapters of The Video
Part 1: 00:03-
How to Make a Character Disappear with a Sound When Tapped.
Part 2: 06:27-
How to Make a Moving Character Disappear by Tapping.
Part 3: 19:09-
Watch The Programs Created by The Programming Robot.
Part 4: 19:24-
Watch The Programming Robot’s Presentation.
How to Make a Presentation: 20:49-
How to Proceed the Test Questions 
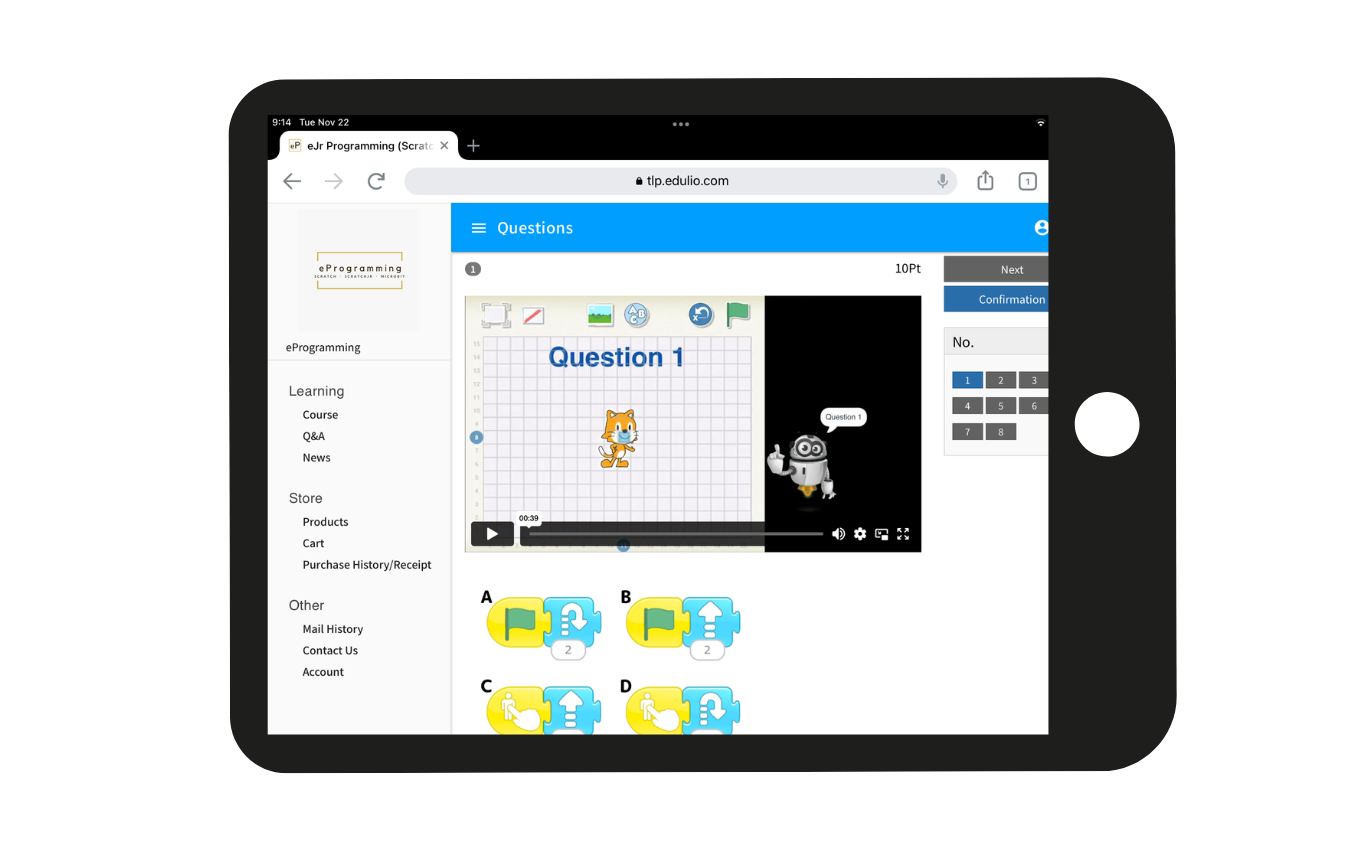
1. Show the video of the Test Questions on a projector ![]() or a large monitor
or a large monitor ![]() , and let all the students solve them together.
, and let all the students solve them together.

2. After solving the questions, press the “Commentary” button  to watch the explanation video.
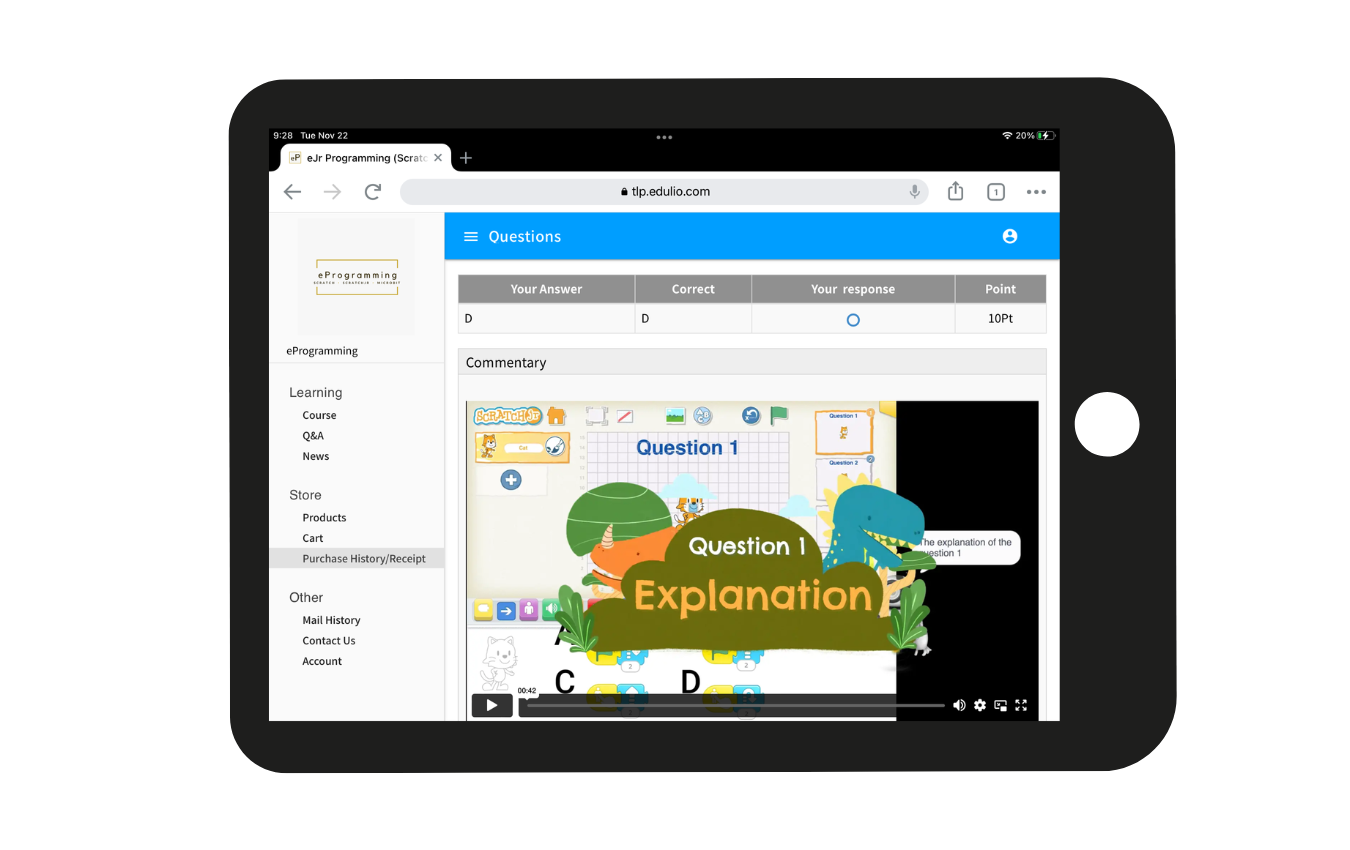
If you have time, it’s also good to download the ScratchJr Projects from the “Teacher’s Guide”, “Easy Lesson 1 – Projects Used in The Video” and see how the correct or incorrect programs work.
How to proceed a Free Programming 
After a lesson and Test Questions, let students do the Free Programming using the blocks they learned in the lesson.
It is extremely important to try programming with their own ideas. Through repeating trial and error, students will learn how to solve problems and develop the ability to express their ideas by programming.
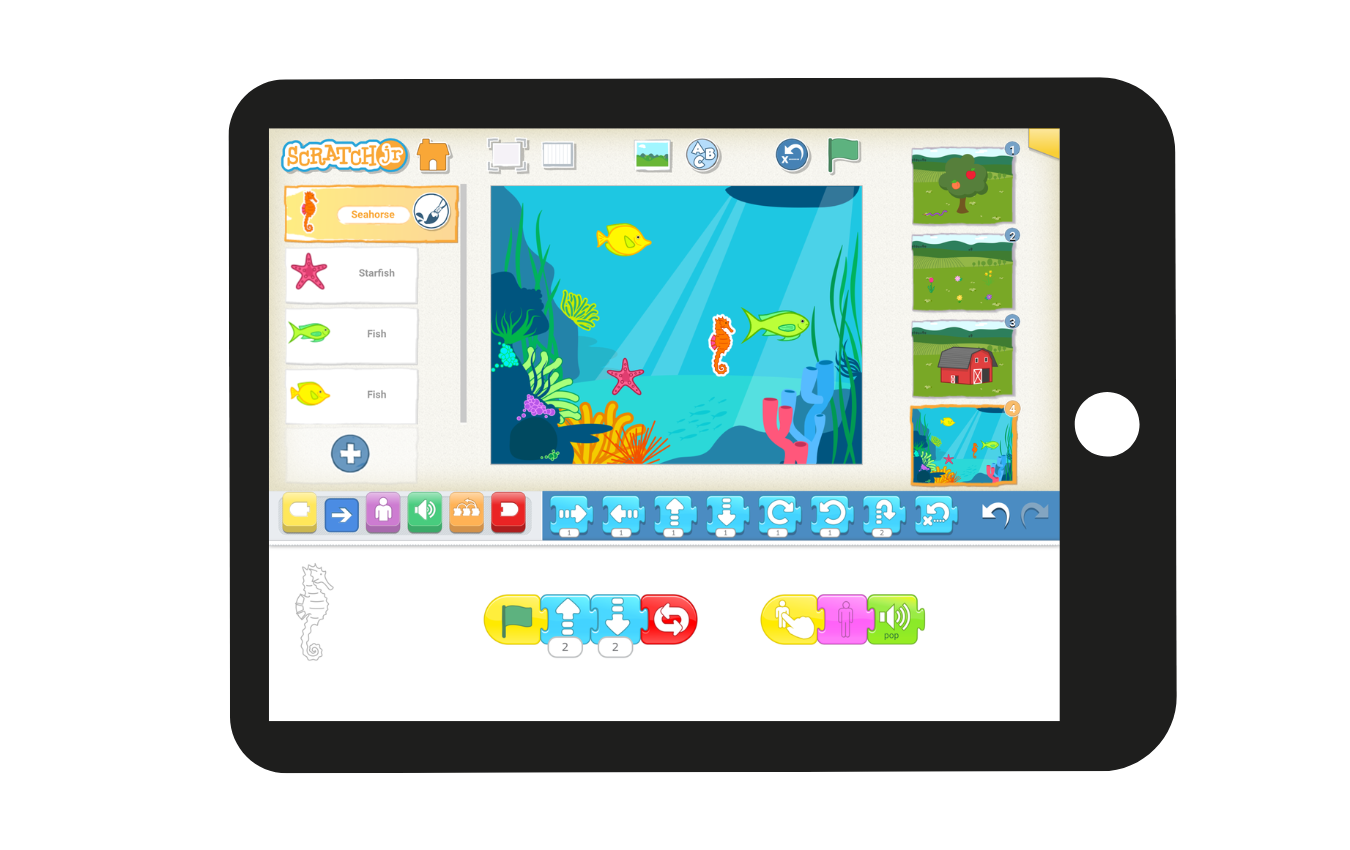
Method 1: After showing children the lesson “Programs created by the Programming Robot ” in the lesson video, let them program freely.
Method 2: Download the “ScratchJr Project for Reference” in “Teacher’s Guide,” “Easy Lesson 3 – Projects Used in The Video.” After showing children the ScratchJr Projects, let them program freely.

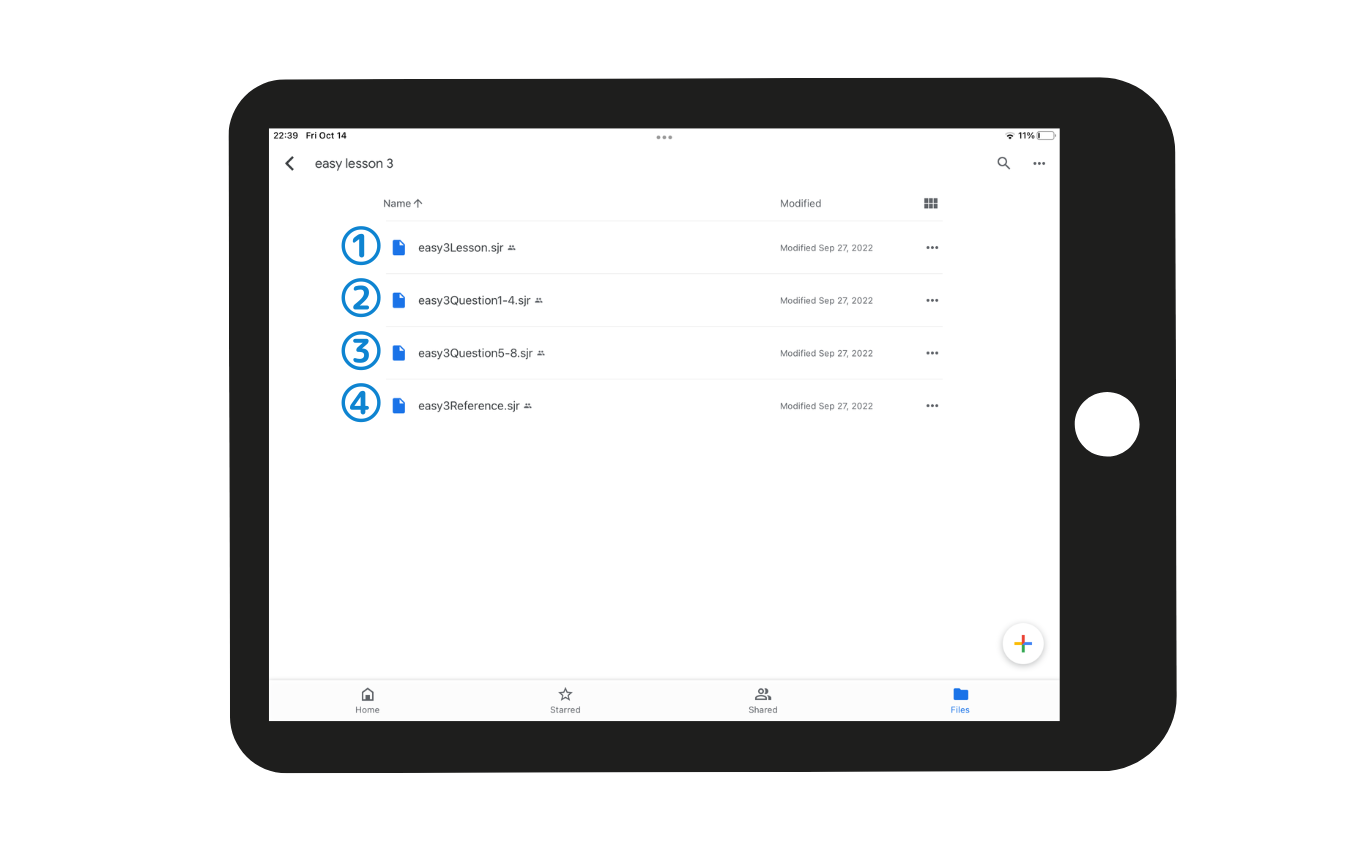
(1) easy3Lesson.sir:
These are the ScratchJr Projects used in the lesson video.
(2) easy3Question1-4.sjr:
These are the ScratchJr Projects used for the questions 1-4. There are also programs for the choices A, B, C, and D, so please use them to check the correct and incorrect programs.
(3) easy3Question5-8.sjr:
These are the ScratchJr Projects used for the questions 5-8. There are also programs for the choices A, B, C, and D, so please use them to check the correct and incorrect programs.
(4) easy3Reference.sjr:
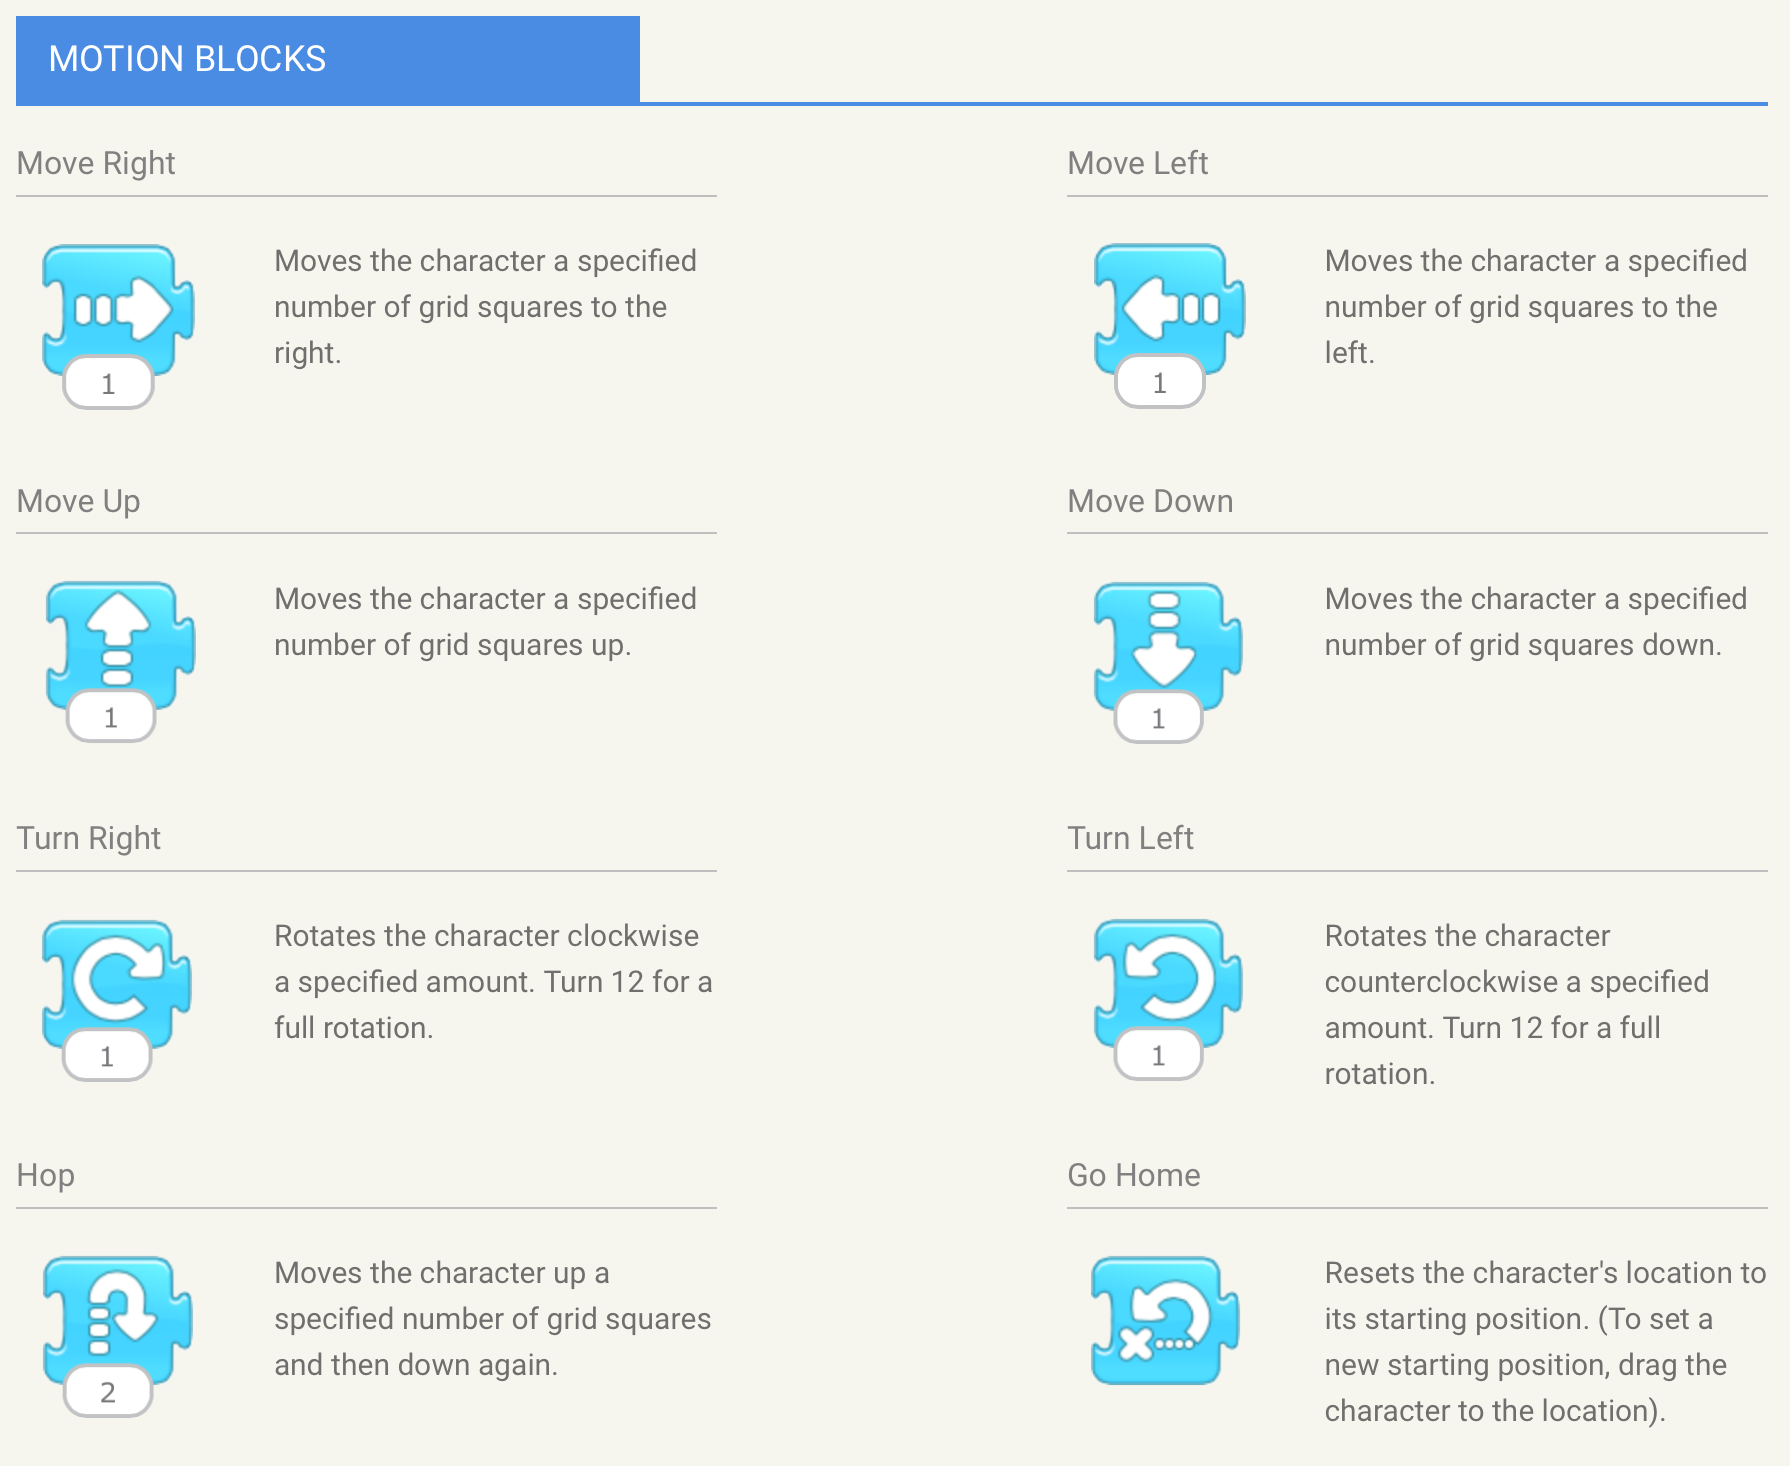
This is a ScratchJr Project using the Motion Blocks. Please use this project as a reference for students to create their original works during a free programming time.
URL for saving projects:
How to Download ScratchJr Projects
Note) If you haven’t opened Google Drive, please tap the icon  to open it and log in.
If you haven’t installed Google Drive, please refer to “How to Install Google Drive” to install it.
Please note that you cannot download ScratchJr Project unless Google Drive is opened and logged in.
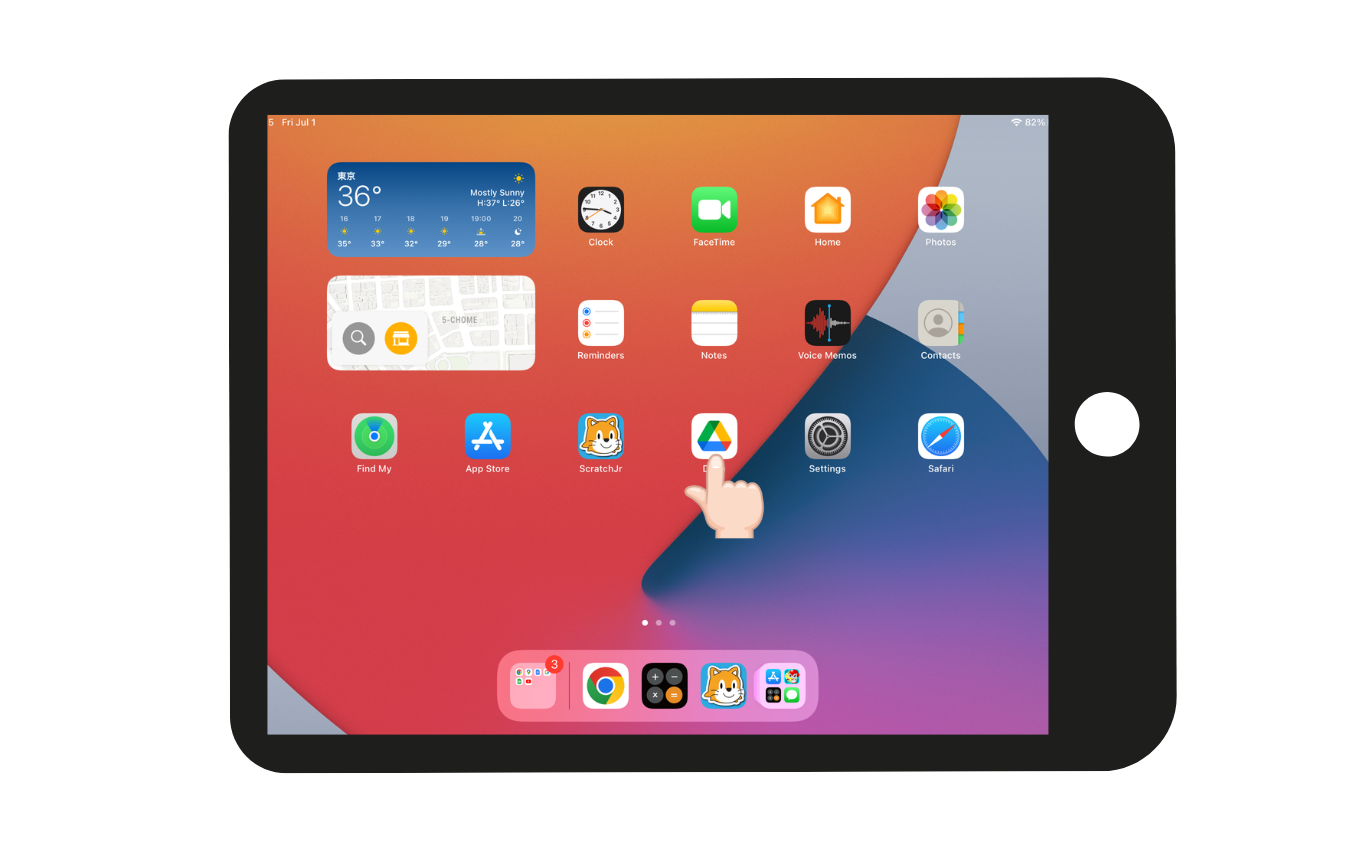
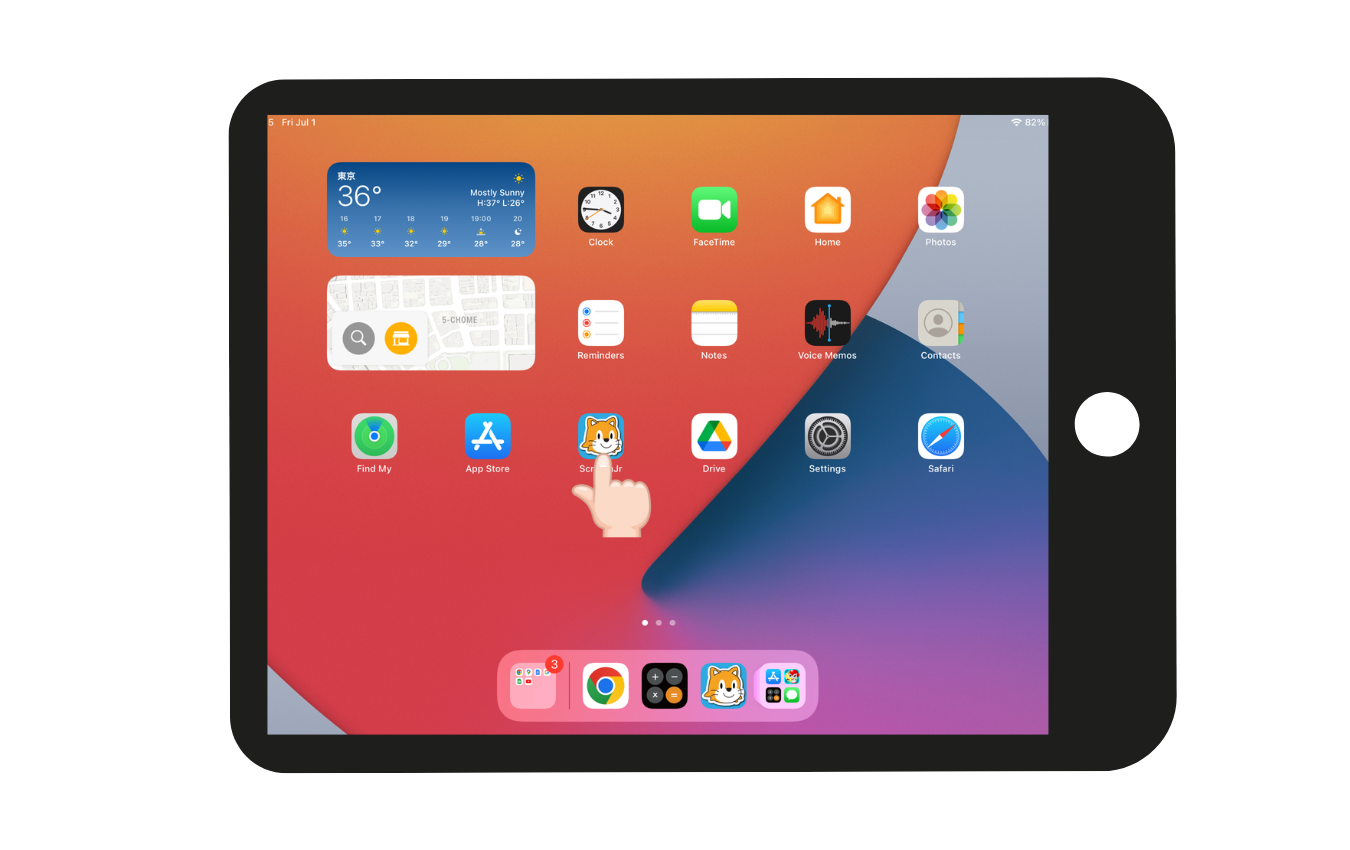
(1) If you have not opened ScratchJr, tap to the icon  to open it.
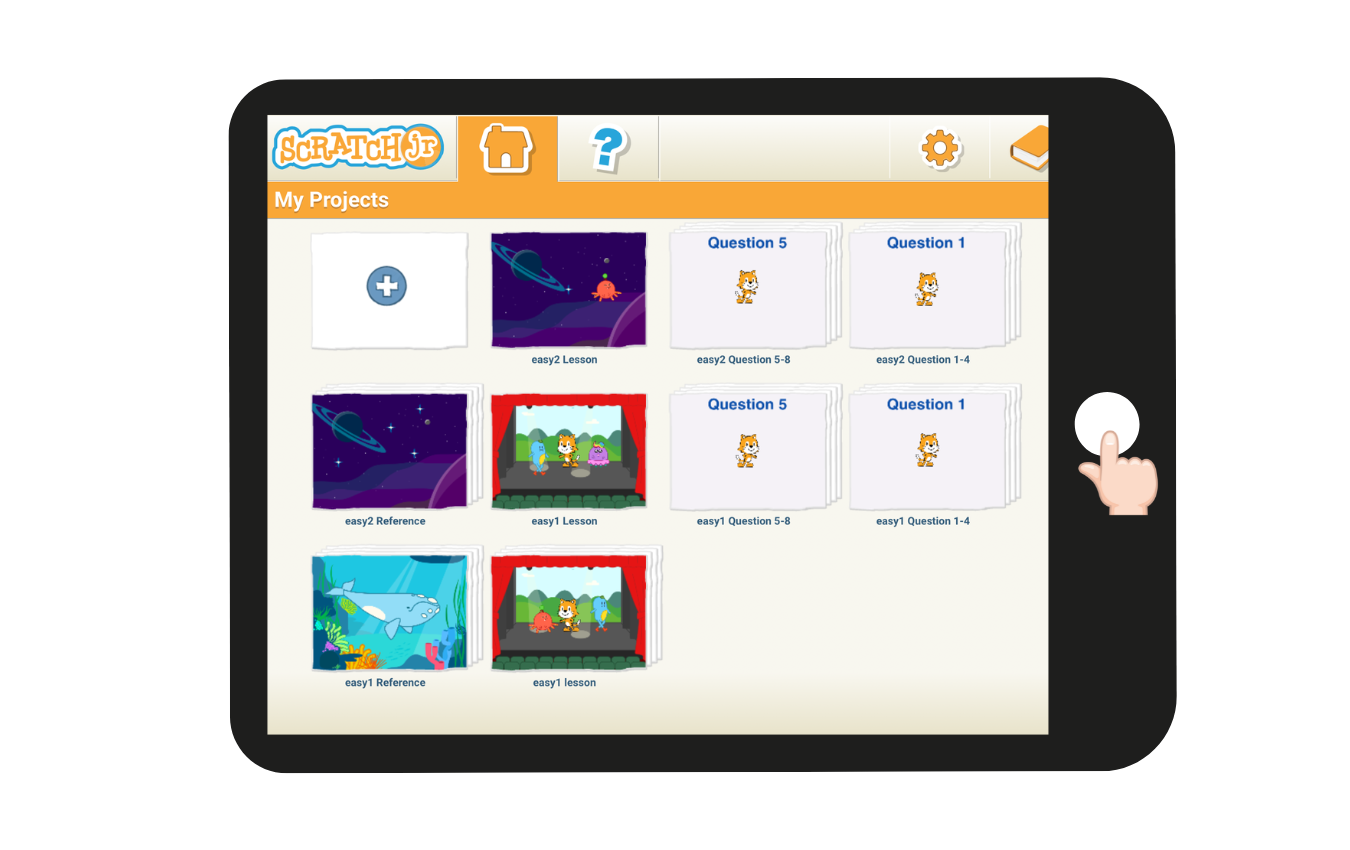
(2) Once ScratchJr is opened, press the Home button on your iPad and go back to the Teacher’s Guide page in eJr Programming.
In doing so, please don’t close ScratchJr but leave it open. Please note that if ScratchJr is closed, ScratchJr Projects cannot be downloaded.
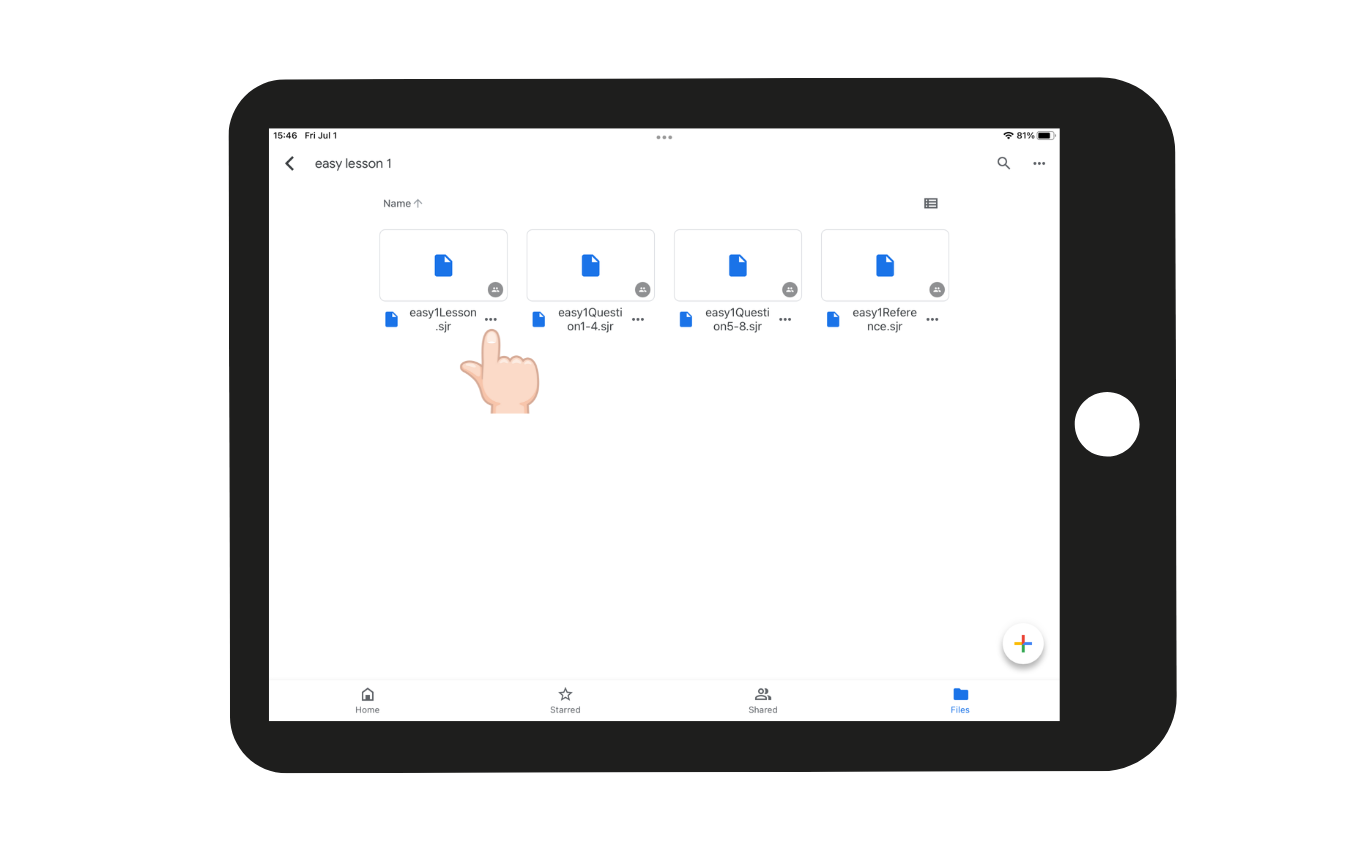
(3) Once you are back on the Teacher’s Guide page in eJr Programming, tap here to open Google Drive.
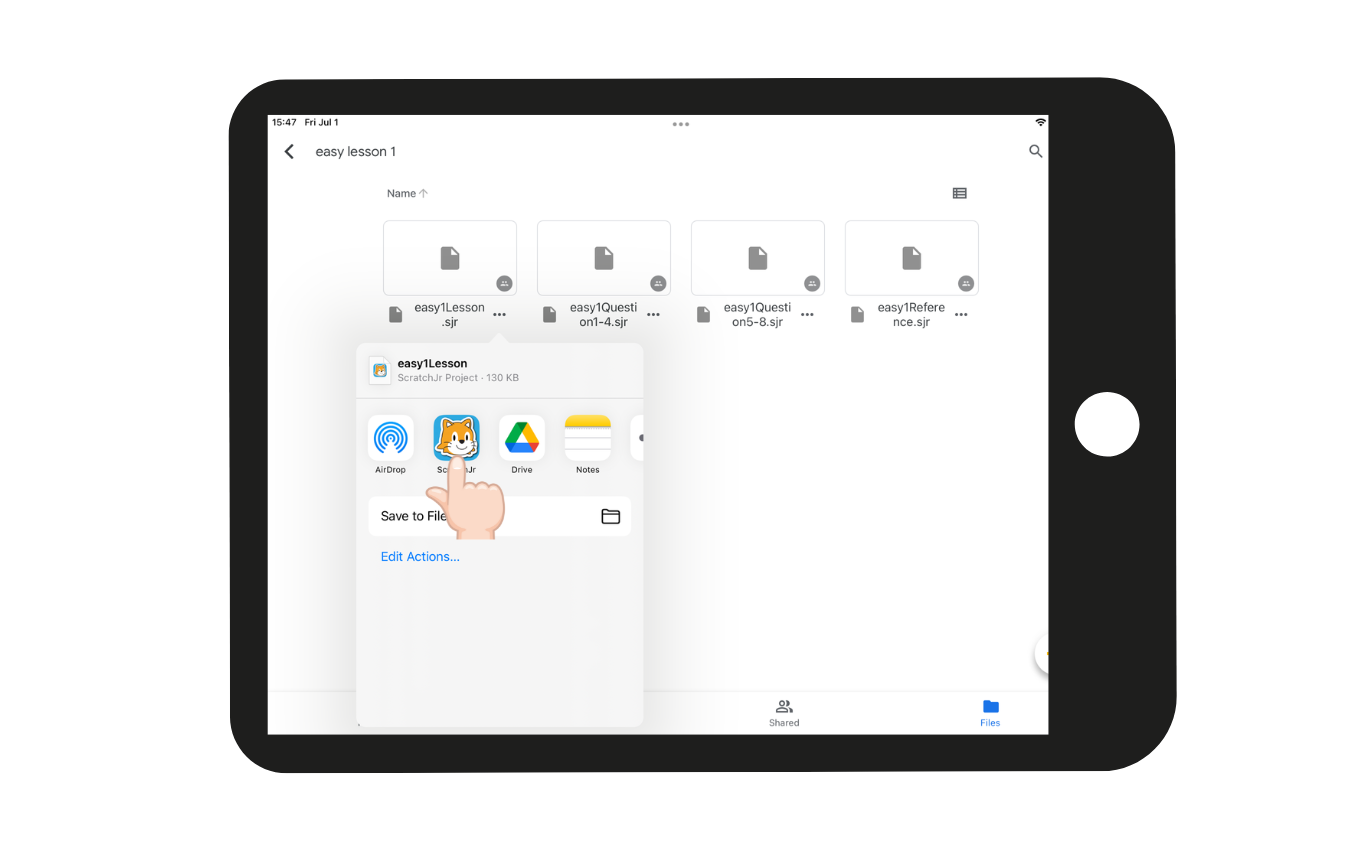
(4) Once Google Drive is open, tap the button  on the right side of the ScratchJr Project you want to download.
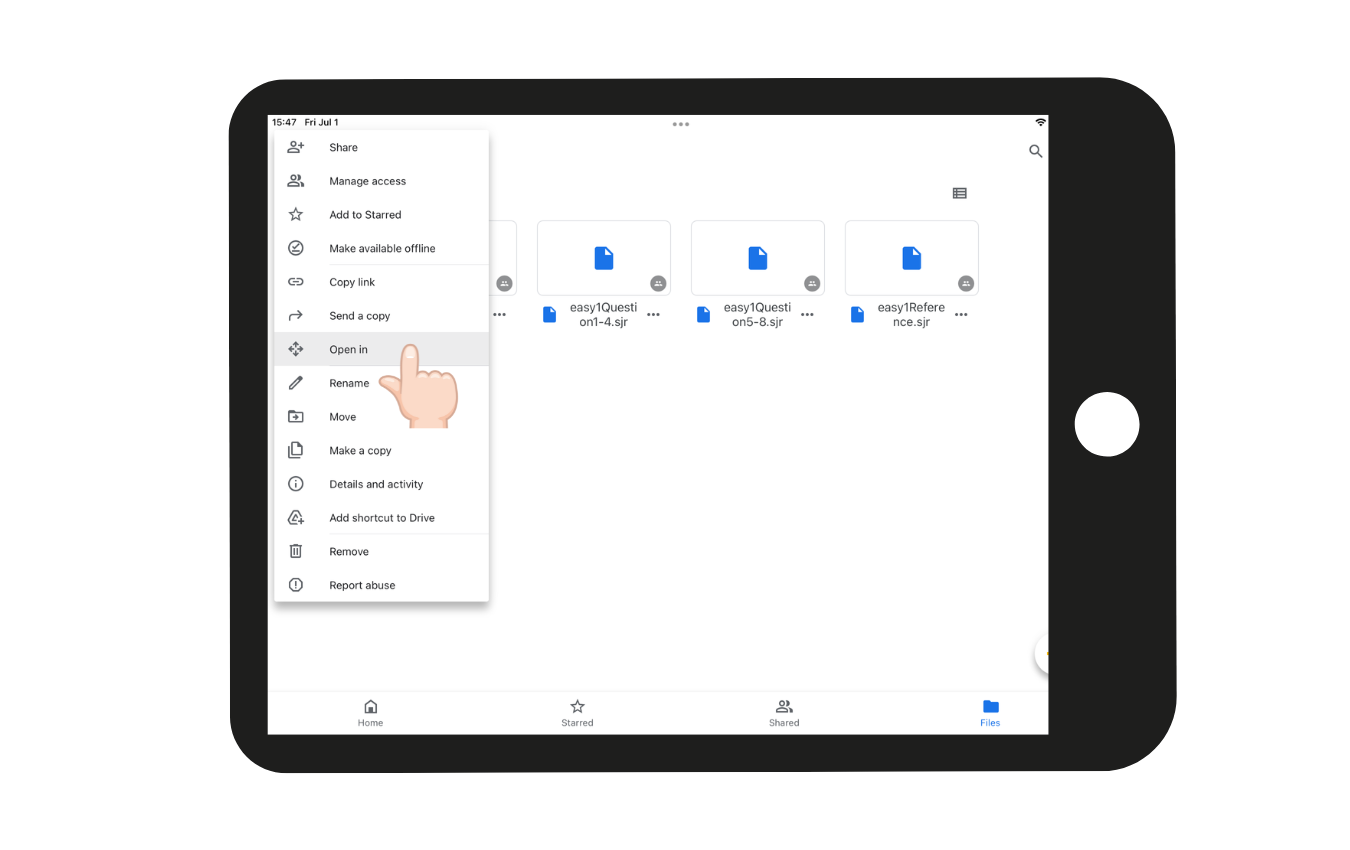
(5) When the pull-down menu appears, select Open in button  .
.
(6) Tap the icon of ScratchJr .
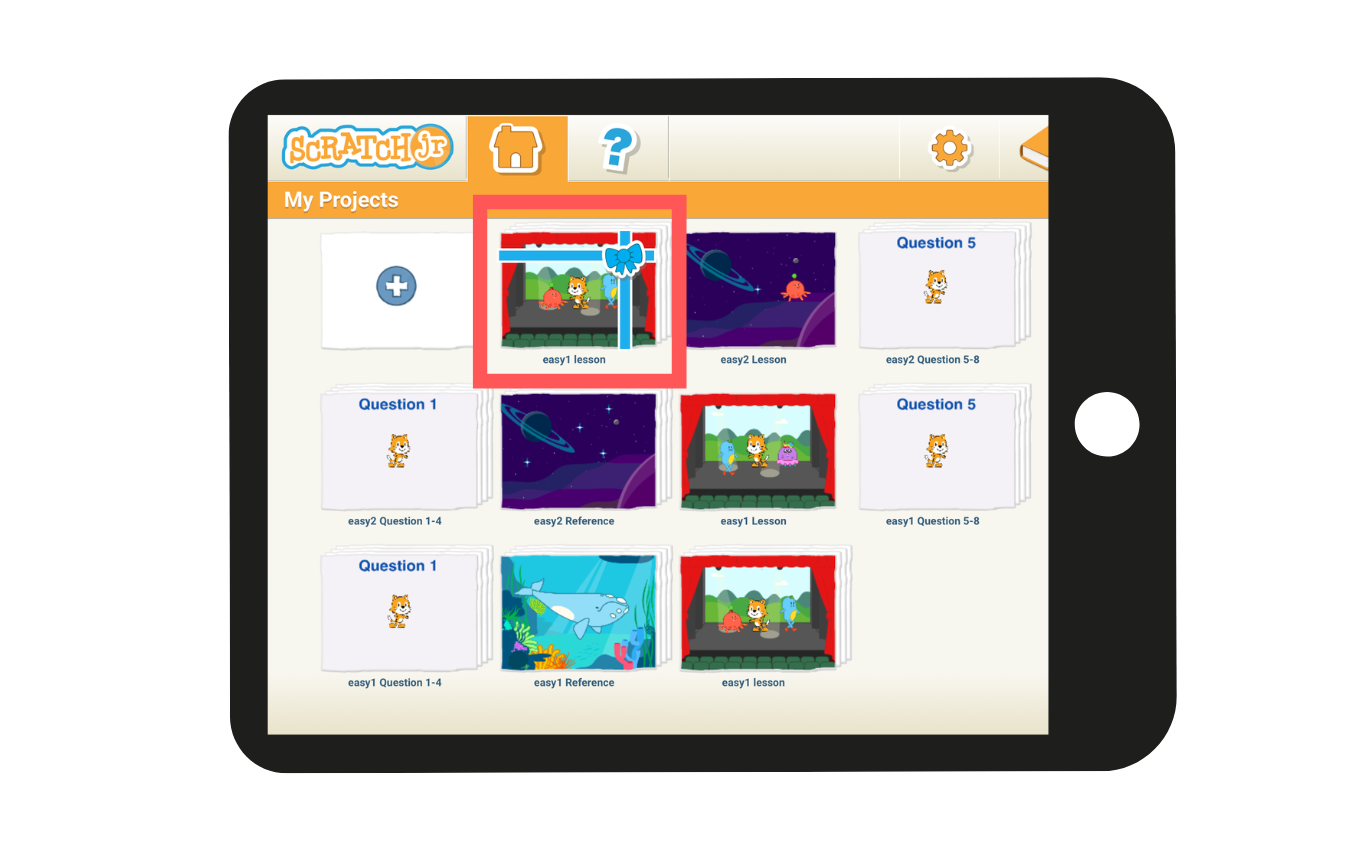
(7) The downloaded ScratchJr Projects will be added to the home screen of ScratchJr.
If You Couldn’t Download a ScratchJr Project:
Please check the following three points:
1. Is Google Drive opened?
2. Is Google Drive installed?
3. Is ScratchJr opened?
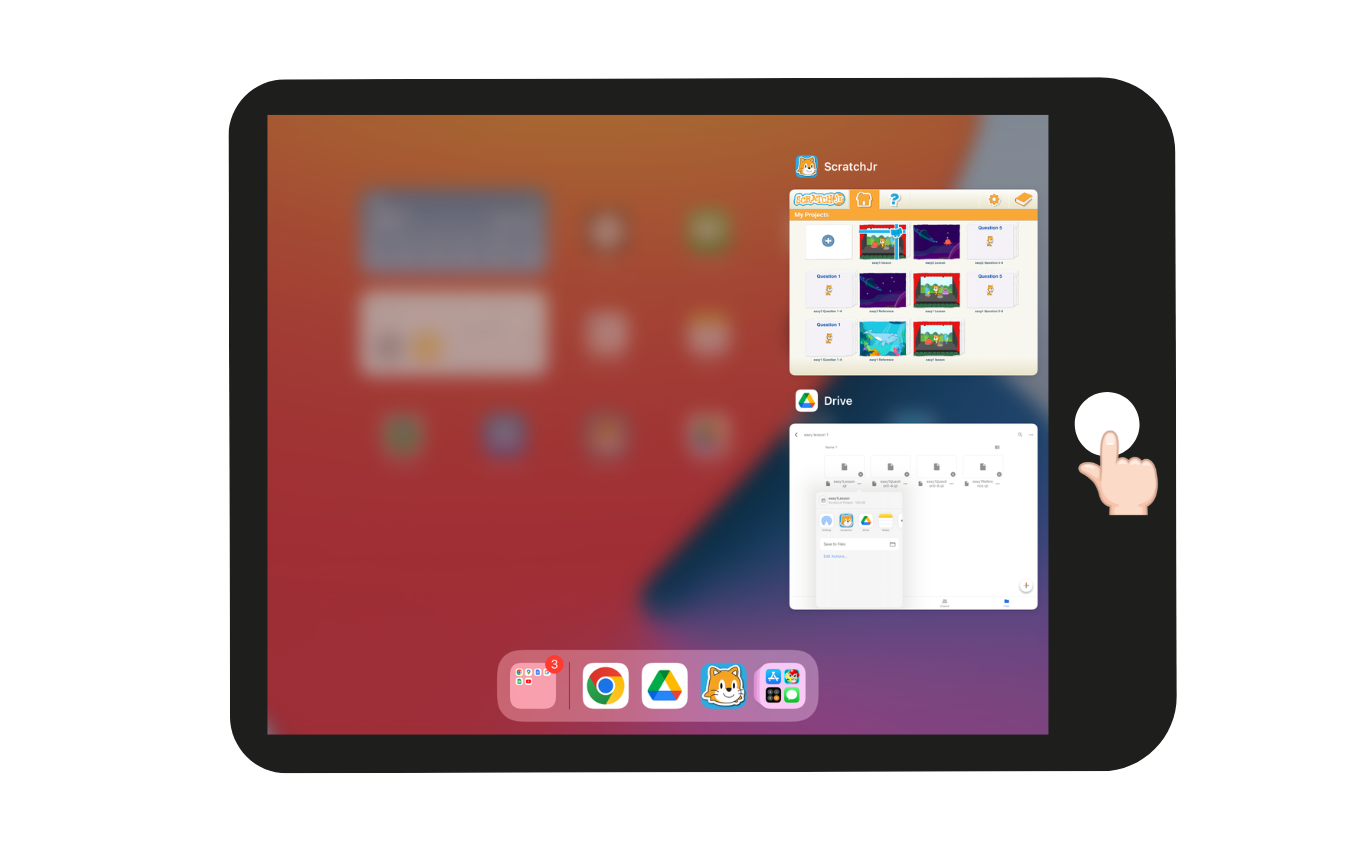
To check if Google Drive and ScratchJr are opened, press the Home button twice quickly on your iPad.
If the screens of Google Drive and ScratchJr are displayed as in the image below, they are opened.
If you have a Google account, please refer to “2. How to Install Google Drive” at the bottom of this page.
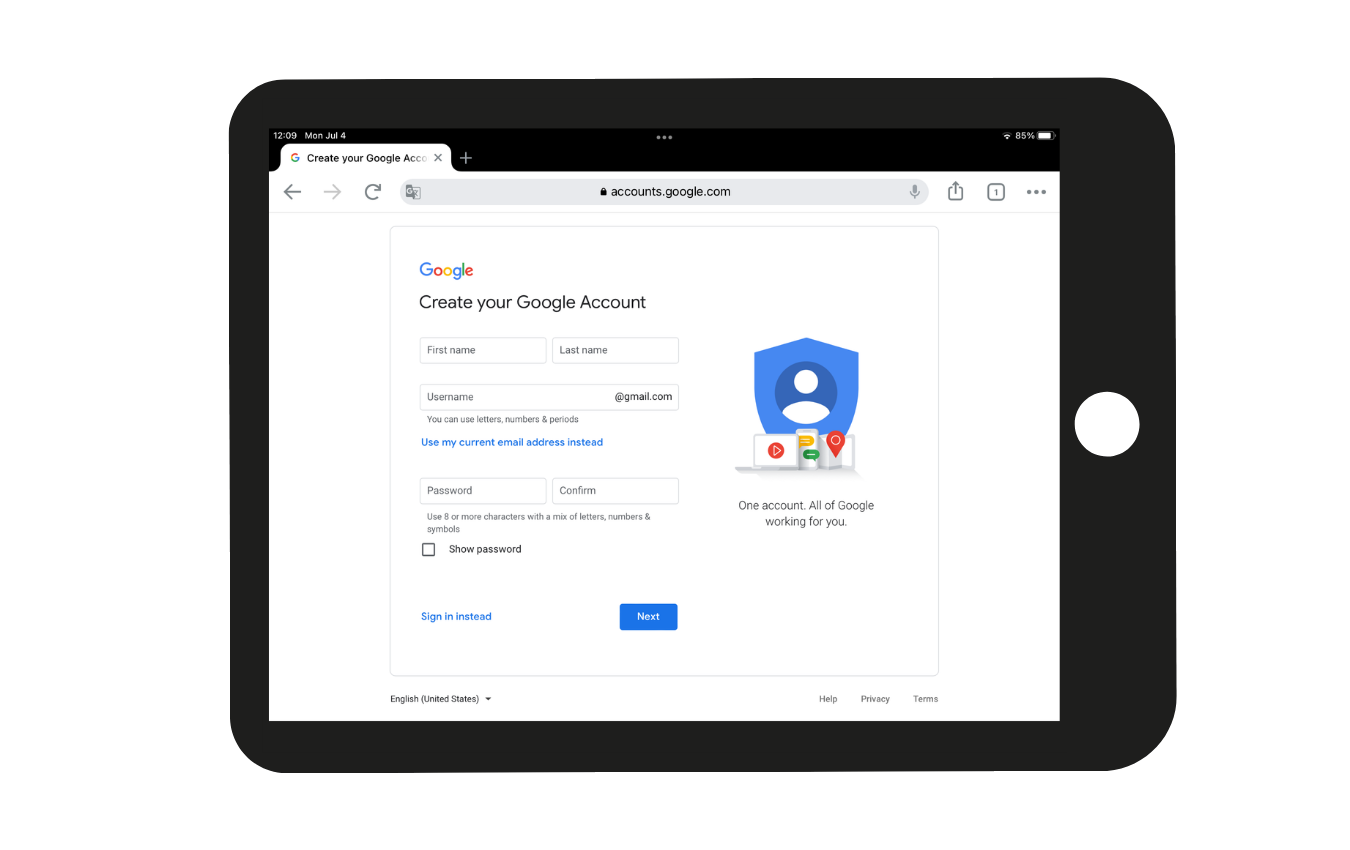
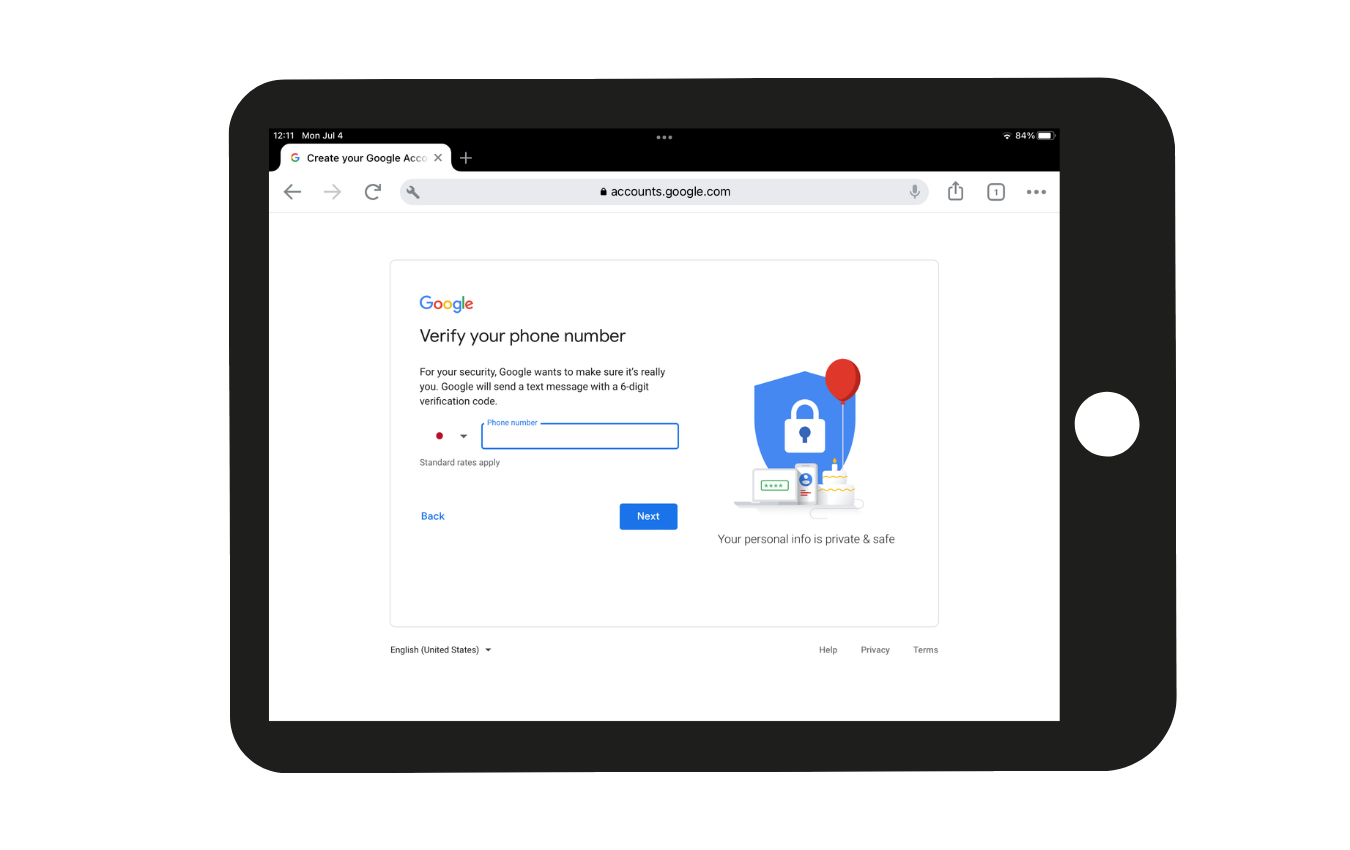
(1) Access the page “Create your Google Account”.
(2) When the page “Create your Google Account” opens, fill in the following information.
Name
Username
Password
After entering this information, tap 
(3) When the page changes to “Welcome to Google,” fill in the following information.
Phone number (Not necessary. The cell phone number is also fine.)
E-mail address for resetting (Not necessary)
Date of birth
Gender
After entering this information, tap
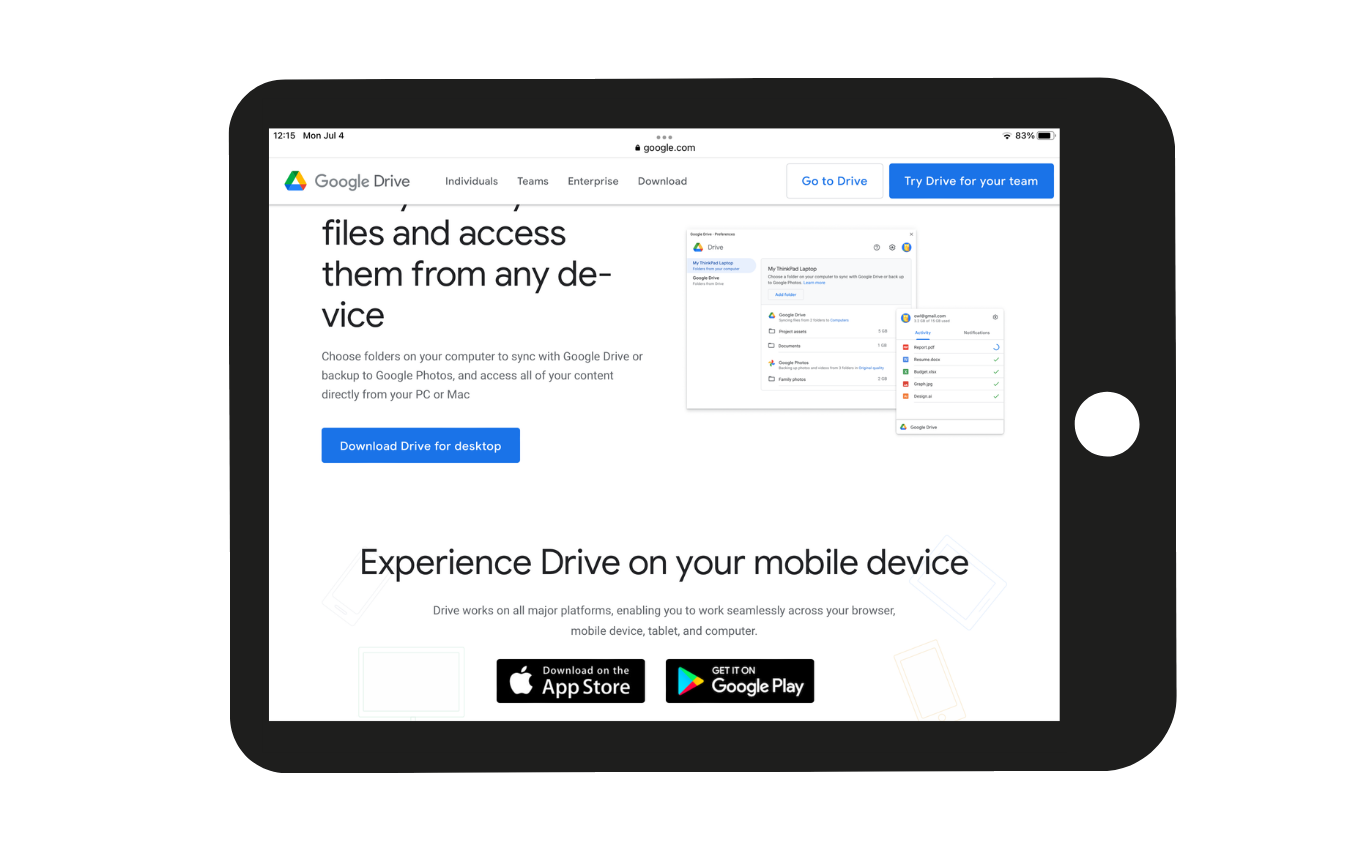
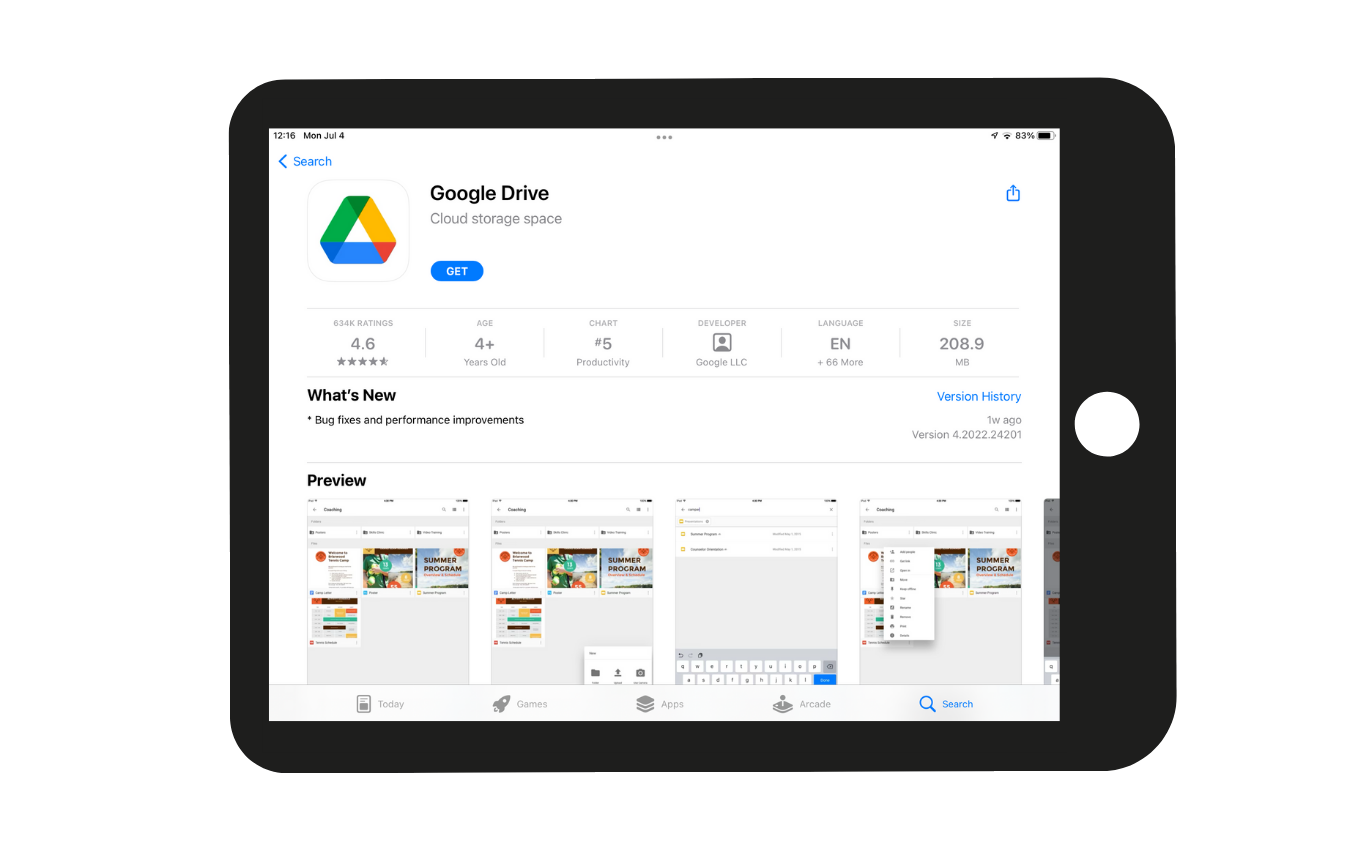
2. How to Install Google Drive
(1) Open the page “Download Drive for desktop” and install the App.
(2) Tap  to start installation.

 This work is licensed under a Creative Commons Attribution-ShareAlike 4.0 International License.